Showing posts with label crochet. Show all posts

Wednesday, May 17, 2017

Tutorial: Zigzagzig Blanket


If you would like to download a PDF of this pattern, please click HERE!


Please note: this pattern is in American terms. British terms are in [brackets]

·         Gauge: not important. Make your blanket as long or as short as you like, make your triangles bigger or smaller by adding more rows or crocheting fewer.
·         Hook: use the hook recommended by your yarn manufacturer
·         Yarn quantity: as this is a scrap blanket, no exact quantities can be given. However, my experience has been that a full sized (generous single bed / a cover for a standard double bed) requires about 15 balls of worsted weight yarn (e.g. RHSS), approx. 4 of which are the ‘main colour’ (here: dark grey). Your mileage may vary, depending on the size of your blanket, your hook size and how tightly/loosely you crochet.


Triangle

Ch 5, join with a slip stitch to form a small ring
Rd. 1 Into ring: ch 3, 2DC, ch 2.
Join new color after this and every other round.

Rd. 2- 7
Ch 3, 1 DC in same (first) stitch,
1 DC in each DC till corner space,
2 DC + 2ch + 2 DC in corner,
1 DC in each stitch till the last. 2 DC in last stitch.
 

When you have seven rows (or larger, as you wish), cut yarn and weave in end. Place the triangles as shown in the photo below and whipstitch them together. I sewed 13 triangles together per strip.

Half-triangle
In order to get a straighter edge, I created a triangle half the size of the others and sewed it in place at the end of each strip.

Ch 5, join with a slip stitch to form a small ring
Rd. 1 Into ring: ch 3, 5 DC
Rd. 2- 7
Ch 3, 1 DC in same (first) stitch,
1 DC in each DC till last stitch,
2 DC in last stitch. 

How do I join the strips?
You can, of course, simply sew them together, but I wanted to create a clearer zigzag pattern, so I crocheted a line of DC [TR]s across one side of each strip in the main color (here: dark grey), then sewed this grey edge to the next strip. This created a ‘line’ between the busy colors and emphasized the colorful zigzags.

As a rule of thumb, I crocheted 2 DC [TR]s into the (sideways) DC [TR]s along the sides of the triangles. Sometimes I used into the top of a triangle (here, for example, into the top of the green one), if the crocheted strip dipped a little too much.


  How do I edge the blanket?
I crocheted enough strips of triangles to make the blanket roughly square, though you, of course, could crochet longer strips of triangles and make your blanket a rectangular shape. When all of the strips were sewn together, I just crocheted two rounds of DC [TR]s in the main color, grey, with 1 DC [TR]+ 2 ch + 1 DC [TR] in each corner. 


Tuesday, October 7, 2014

Owls and Penguins On Their Way


Ah, charity.
Don't get me wrong. Big charities are the ones with the clout, the ones that can make changes, lobby governments, make a significant difference. But I live in the centre of a small city and I am accosted daily by toothily attractive young people out collecting direct debit details (no, they don't shake a can under your nose any more, they want a permanent recurring donation direct from your bank account), handing out shiny literature and unwanted compliments. So while I could never say a bad word about UNICEF or the Red Cross, I sometimes also like to make a donation to a charity with the feeling that I am directly contributing to something, that my money or my effort goes directly to someone in need, and does not get used in part to pay an hourly wage to collectors, printing costs, advertising, directors' salaries ... or anything else the big charities need to continue to function and make their difference.

One of my friends runs a Christmas bazaar to collect money for our local children's clinic. Helped by an army of elderly ladies, they spend the year knitting and crocheting and jam-making for their stall during the holiday season. The money they make is used to buy equipment for the local clinic or to fly children in from crisis areas for needed operations. The medical staff at the clinic will operate for free if the ladies can fly the patients and their parents to Germany. So this is what they do: a handful of pensioners spend the Advent Saturdays in the freezing cold, selling chutneys and scarves and candles, and euro by euro they make enough money to make a small difference in a global sense, but a huge difference to a small group of individuals. That's good, too.

Last year I made a stack of owl key rings and they sold out within an hour. This year, I've started again. I plan to make thirty of them - and more if my fingers don't fall off. And I'm finally going to post the pattern for you! (just give me a day or two...) While some people feel a bit odd about the results of their patterns being sold (which, by the way, is apparently not illegal under US copyright law, so there you go - you learn something new every day), I have no problem with you using this pattern to make gifts for the holiday season, to give to or sell for charity - and if you make a few bob for yourself as a result of making them ... well, good for you. Be warned, though, the little blighters have a mind of their own. When I set up this photo, they were all facing upwards, I swear. But the one in the bottom lefthand corner is trying to escape and the pink one in the second row is pulling his neighbour's feathers. Spooky!


Caught in the act. Can't leave them alone for a second.

Thursday, September 11, 2014

Tutorial: Lo-So Crochet Tote Bag


While rooting through one of the large bags of yarn that I keep hidden stored in the bedroom cupboard, I found a bag-within-the-bag that is - cringe - my Bag of Shame. Therein I found my little stash of started projects that had been abandoned in favour of something more exciting. Including a bunch of neat little cotton squares, bordered and stacked and ready to go:


They were supposed to be a cushion cover but upon looking at them again, I thought they might make a nice bag ... but the sewing! Bleurgh: sewing a lining for a cotton bag is just so much hassle.

Then I had a brainwave: instead of sewing a lining for a bag, why not sew a bag for the lining? And the Low Sew (Lo-So!) crochet tote bag was born. I wish it were a No-Sew (No-So :-) ) bag, but I haven't figured that one out yet.  

You need - 
- crochet squares in a pattern of your choice
- a linen shopping bag (even one that has a printed logo: the logo will be covered by your crochet work. I bought plain linen bags on Amazon for 99c.)
- a darning needle
- a sharp sewing needle
- strong sewing thread in a colour close to the colour of the bag


I simply sewed the squares together (but you can crochet them together or use the join-as-you-go method) and placed them on the bag to determine how much bigger the bag was: 

Toy car not necessary, but apparently helpful


You want your panel to be slightly bigger than the linen bag, so I crocheted two rows of double crochet at the top and bottom, and one row of half-double crochet on each side. I did this on the front (pic on the left) and back (right) panel.

I then turned them face to face and sewed them together on three sides, leaving the top open. I turned the crochet bag/cover right-side out, and slipped the linen bag inside.

Taking a sewing needle and strong sewing thread (I simply doubled mine), I sewed the top of the crocheted bag to the top  of the linen bag, so that the linen bag became the lining of the crochet bag! Sneaky, eh?

Please look closely at amazing sewing technique and do not look at unmanicured nails. Thank you.
To stop the linen bag from wrinkling up inside its crochet cover, I simply turned the entire thing inside-out again and stitched the crochet bag and the linen lining together at the corners - just a few strong stitches to anchor it, that's all.

The last thing I did was to crochet a small strap to close it at the top and add a button. That's it. Easy-peasy!


Sunday, August 24, 2014

Rainbows

 A friend asked me to make blankets for a friend of hers, who's expecting twins. I was told that the mother-to-be wanted "rainbow blankets". Rainbow-coloured blankets, I asked, or blankets with rainbows? It's always hard to guess what will appeal to someone you haven't ever met, so I made this pair of blankets in the hope that she'll like them.


Sunday, January 5, 2014

Never Again


When I was making this blanket, I started crocheting little colourful squares to use up bits and pieces of yarn that were left over. I began to accumulate a lot of squares. And a lot more. And even more.

So I started to sew them together. And at some point, I had a larg-ish blanket that needed to either be made smaller and turned into a baby blanket, or made larger and turned into an adult-sized blanket. Why take the easy way out, you ask? Exactly - just make more squares.

When it was finally finished, I was happy to swap it for ... a rocking chair. The giver of the rocking chair wanted to buy it off me, but how do you put a price on a blanket made up of over a hundred little squares, each with five colour changes, all of that end-weaving and sewing? In monetary terms, you just can't. But a rocking chair is a fair deal.

My assistant.
 "What's the name of this pattern?" a non-crafting friend asks.
"Never again," I say. "It's called 'Never Again'. Or just plain old granny squares, if you prefer."

Thursday, July 25, 2013

No Sleep Till Brooklyn. I mean, Gingerbreadtown

We - that is, my husband - decided to "sleep train" our son. Now, I apparently agreed to this but I can't remember doing so (which is what happens when you're sleep deprived), so my husband read all of the Expert Literature on getting babies to sleep and decided we would do the "gentle method" (as it's called in German.) This involves putting baby down to sleep with some nice cuddles and soothing words, then leaving the room, only to return at regular, short intervals to soothe him and reassure him you're there. It works, I was promised. Even my friend Sandra reported her sister's success - it worked for her son and sometimes he even screamed for an hour and a half.

Oh, I laughed bitterly.

My son can scream in pure rage and fury for FOUR hours. FOUR HOURS, people. If we leave him alone for more than three minutes, there's an ominous silence, followed by more Screams of Rage: that's the point when we have to go in an extricate him from the bars of the cot or from underneath the mattress where, bizarrely, he has managed to jam a hand or leg. After ten days of intense battles, we have reduced the screaming to 90 minutes on a bad night and he hasn't lost a finger on a bed spring yet, despite his best efforts.

Now, let me just remind you of the facts: we are two adults in our late thirties. My husband hit 6' (180cm) and kept going for a bit. I'm not a small girl, not by anyone's standards. Yet our nine-month-old demonstrates a strength and stamina that leaves us speechless (and sleepless). If he wants to get down off our knees, he's getting down. If he wants to climb into the washing machine, well, darnit, he's going to climb in. And if he thinks there's a chance to get out of the cot, he will do his utmost, by hook or by crook, to escape Baby Alcatraz.

Anyway ... let's move on to more exciting things. My latest pattern is being tested by two sets of nice ladies, with eagle eyes and sharpened hooks. It's called Stars & Flowers because ... well, maybe you might see why:


It's close to finished and I hope it'll be ready to download just as the weather turns cool in the northern hemisphere (i.e. by September, at the latest!)

Thursday, June 13, 2013

A Dirty Floor and the Creative Urge

Up till yesterday morning, my kitchen floor was filthy. Really, really dirty. When my sister and her family left, they also left behind a floor that suffered for a week beneath ten pairs of mucky feet, fresh in the door from rainy playgrounds and damp sandboxes. And I meant to clean it, honest I did. It's just so ... tiresome. I hate housework, I really do. The advent of mobile devices has assuaged my hatred somewhat, as I now can watch documentaries about the Vikings on my iPad while scrubbing the bathtub, but given the choice, I'd rather not scrub anything, ever.

While here, Emily and I talked about her now-hibernating project to co-write (with other people, not me) about being a creative mother (or maybe that should be: Creative Mother). We came to the conclusion that it's very hard to teach someone how to be creative - and probably the last thing you ought to write a book about. If you're creative, you spend every single spare minute doing things and making things and thinking about ways to do and make things. You don't need to make the conscious decision to do this, you do it because not doing it is like not scratching an itch, not removing an eyelash from your eyeball or a stone from your shoe. You do it because you have to. If you're like me, your Amazon shopping basket is possibly full of soap-making supplies, your living room is full of bags of yarn, you have pens and notebooks stashed everywhere and a crochet hook in your nightstand. You also have a dirty kitchen floor, an over-flowing hamper of unwashed laundry (and, on that subject, you probably can't remember where you put your iron, it's been so long since you used it.) You occasionally shovel a spoon of apple purée in your infant son's ear, because you're daydreaming about your next project and don't notice him bend down to fetch a fallen toy.

See? Not the kind of thing you write about, not something whose virtues you extol in connection with mothering, as much of my creative urge results in neglected household duties and an apple-eared child.

But what's creativity anyway? One of my friends is adamantly uncreative in the traditional sense. She can't draw for toffee, she says. She mangled a scarf in knitting class forty years ago and has not picked up a needle since. But she's tidy, oh my goodness, she's tidy. She cleans and tidies for fun. Her house is beautiful, her cupboards are a joy. She puts things in order - by shape, size, colour, age. She expresses herself through order and organisation and I am every bit as much in awe and envy of her skills as she is of mine. I could no sooner teach her to be spontaneously creative than she could teach me to spontaneously clean. While my kitchen floor would make her itch, I can blithely ignore it till I have done more important (to me) things, like sew together a stack of motifs, testing my latest pattern:


When the last treads were woven in, photos taken and uploaded, then I got out the mop and did the kitchen floor. I now have a clean kitchen and a new blanket - happiness all round!

Monday, March 11, 2013

Stained Glass Flowers

I've always loved the Cathedral Rose pattern, published by Annie's Attic. So much so, that I even bought a copy of it... but although the end result is always beautiful (and there are dozens to be seen on Google Images), the pattern is a bit daunting: lots of text, no photos or diagrams. For a visual learner like me, it's a little off-putting.

So I started thinking about my own stained glass pattern. It's what the Réalta pattern was supposed to be but didn't quite become. Creating a nice motif isn't hard, what is tricky is lining up the colours:


 I want to have the effect of light shining through the window, so the centre has to be the lightest, brightest point, with the colour graduating in shade towards the black frame of the window pane.
A little bit like this:


I'm pleased with the result so far. The first hexagons are lush with colour and I can't wait to add more. I've dug out every scrap of coloured yarn I have to line up shades and tones, just to find a nice colour sequence. Oooh, I like this!


Wednesday, August 29, 2012

Summer Daisies

When I'm feeling smart and witty again, I'll tell you about my Potential Life of Crime as a pregnant woman. In the meantime, I'll show you what I've just finished:


This started off as a round-ish blanket because I didn't want the bother of designing a half-hexagon to straighten out the edges:


Sadly, my OCD tendencies just could not cope with the chaos and a solution had to be found, even though I was reassured that round-ish blankets are also quite fetching and have their place in home décor.
But ...
I - just - could - not - deal - with - it

Already someone has suggested that this pattern would make a nice Christmas afghan, with red flowers (poinsettas) and a dark green background. Hmmm!

Now all I have to do is write up the pattern, take the photos, get my testers on their starting blocks and then I can finally offer it for sale - maybe even before the Gingerbread Cookie makes his appearance.

Saturday, July 28, 2012

The Hitchhiker's Guide to Pregnancy

Pregnancy.
It's a bit like stopping a car to pick up a hitchhiker. At first, he's pleasant company, making chitchat and smiling politely at your witty remarks. As time goes by, the hitchhiker gets a bit demanding - he wants to change the radio channel and turn on the air-conditioning. At some point, he just becomes stroppy and starts bossing you around in your own car, insisting that you stop for breaks or making you take detours or change routes. Finally, you realise that you're basically just the chauffeur and the hitchiker has completely taken over. You're the driver but the passenger's the boss.
This is what it's like to be eight months pregnant.

My hitchhiker doesn't like it when it's quiet: he likes a bit of action and steady movement. I have to jiggle my legs constantly to create a rocking motion: as soon as I stop, I get punched and kicked. As the hitchhiker has not yet grasped the concept of night and day, he spends most of the night punching me awake. And woe betide me if I roll over into a position that he doesn't like: I'll get a kick in the ribs to remind me that my comfort is secondary and don't forget it. The hitchhiker also likes walks: lots of movement and fresh air - except that it's at least 30°C (86°F), which is about ten degrees warmer than any pregnant woman would like, so my walks are short and shady. When I sit down to admire the trees in the park and give my feet a rest, I get a few kicks of protest to remind me that it's not all about me and five minutes' rest are long enough: get your pregnant bottom moving again, woman!

Well, at least I know my place in this relationship.

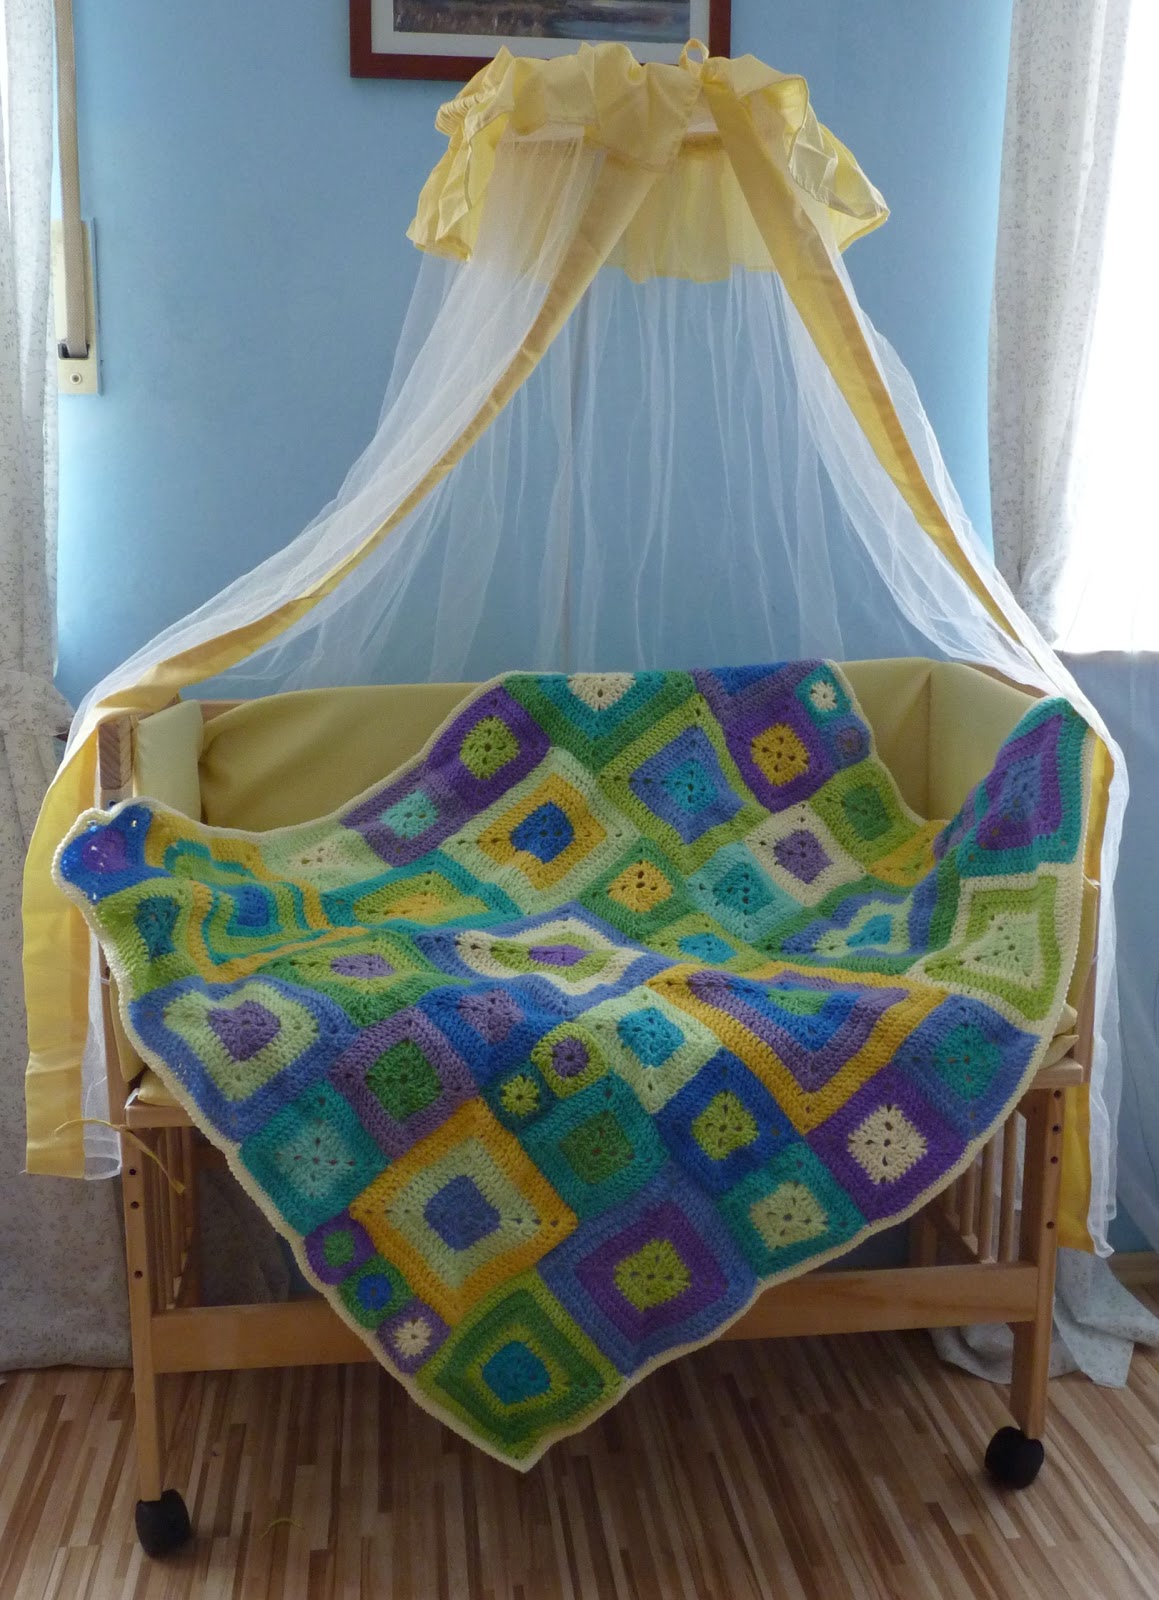
This week, my husband and I assembled the baby's crib - which means that I fetched my toolbox (an empty ice-cream carton with my 99c screwdriver and one of those wrench-thingies that come with IKEA furniture) and my husband fetched his (three-tier toolbox with multiples of everything, its crowning glory the Black and Decker electric screwdriver.) It was quickly decided (by him) that I should leave my toolbox-slash-ice cream carton closed and hold up the instruction sheet instead. I did so - and very well, if I must say so myself. We decked the cot out in the enclosed draperies, but it looks like a vat of custard exploded inside it. Besides, I'm not sure about the health benefits of swathes of material and netting around an infant, so we'll strip it once it has served its purpose as a photographic prop:


This one was made to use up odd skeins of yarn. I'm still working on my daisy afghan but needed a change from white and yellow - so I grabbed all the bits and pieces that I had, and started making a random collection of squares. Now all I need is a recipient!

Sunday, June 3, 2012

PATTERN: Circle-in-a-Square

 
This is a simple square - or, to be more precise, a circle in a square. I've chosen to do mine with a restricted palette - cream as the main colour and three bands of colour (cream, cappuccino and sky blue) around the circle.

This pattern can be dowloaded as PDF via Ravelry: download now

This pattern uses American terminology. The British terms are in [brackets].

  • ch  - chain
  • SC [DC] - single crochet [double crochet]
  • HDC [HTR] - half double crochet [half treble]
  • DC [TR] - double crochet [treble]
  • TR  [DTR] - treble [double treble]
Start with your main colour

Chain 4. Join with a sl st to form a loop.
Round 1: Chain 3. This counts as 1st DC [TR] here and throughout! 11 DC [TR] in loop. Join with sl st to top of ch 3. (Stitch count: 12 DC [TR] in loop.)
Round 2: Chain 3, 1 DC [TR] in same st. 2 DC [TR] in each st in the round. Join with sl st to top of ch 3. Ch 1, yank tight, cut yarn and weave in end. (Stitch count: 24 DC [TR] ).

Change colour - colour 1
Round 3: 1 ch, 1 DC [TR] in same stitch, *2 DC [TR] in next stitch, 1 DC [TR] in next stitch. Repeat from * around, ending with 2 DC [TR]. Join with slip stitch.

Change colour - colour 2
Round 4: 1 ch, 1 DC [TR] in same stitch and 1 DC [TR] in next stitch, *2 DC [TR] in next stitch, 1 DC [TR] in next two stitches. Repeat from * around, ending with 2 DC [TR]. Join with slip stitch.

Change colour - colour 3
Round 5: 1 ch, 1 DC [TR] in same stitch and 1 DC [TR] in next two stitches, *2 DC [TR] in next stitch, 1 DC [TR] in next three stitches. Repeat from * around, ending with 2 DC [TR]. Join with slip stitch.
You should now have 60 DC [TR] around your circle. 

Change colour back to your main colour
Round 6:  1 ch, *2 TR [DTR] in same stitch. 1 DC [TR] in the next two stitches, 1 HDC [HTR] in the next two stitches, 1 SC [DC] in the next five stitches, 1 HDC [HTR] in the next two stitches, 1 DC [TR] in the next two stitches, 2 TR [DTR] in same stitch, 2 chain **.
Repeat from * to ** three more times. Join with slip stitch to the top of the first TR [DTR].


Round 7: 1 ch, 1 DC [TR] in same stitch and *1 DC [TR] in each of the next stitches. In the corner space, crochet 2 DC [TR] + chain 2 + 2 DC [TR]**.  Repeat from * to ** (i.e. crochet one DC [TR] in each stitch, and 2 DC [TR] + chain 2 + 2 DC [TR] in each corner.)


Round 8: Repeat round 7. Leave a long tail to sew the motifs together.