

First of all, the pattern. I like to use a solid square for this pattern. I use it a lot – most recently in the Equalizer Blanket.
__________________________________________________________________
 PATTERN: SOLID SQUARE
Colour A
Round 1:
Chain 3 (counts as the first DC [TR]), do 2 DC [TR] into the ring. Chain 2, 3 DC [TR], chain 2, 3 DC [TR], chain 2, 3 DC [TR], chain 2 and join to the third chain of your first 'fake' DC [TR] - like this ->
Chain 3 (counts as the first DC [TR]), do 2 DC [TR] into the ring. Chain 2, 3 DC [TR], chain 2, 3 DC [TR], chain 2, 3 DC [TR], chain 2 and join to the third chain of your first 'fake' DC [TR] - like this ->
 Round 2:
Chain 1, do 1 DC [TR] in the same stitch below. Crochet 1 DC [TR] in next two stitches, *in corner space, crochet 2 DC [TR] + 2 ch + 2 DC [TR], then crochet 1 DC [TR] in the next three stitches.** Repeat from * to ** twice more.
 Join with slip stitch to the top of the first DC [TR].
Colour B
 Round 3:
Chain 1, do 1 DC [TR] in the same stitch below. Crochet 1 DC [TR] in next four stitches, *in corner space crochet 2 DC [TR] + 2 ch + 2 DC [TR], then crochet 1 DC [TR] in the next seven stitches.**
Repeat from * to ** twice more. Join with slip stitch to the top of the first DC [TR].
Round 4:
Chain 1, do 1 DC [TR] in the same stitch below. Crochet 1 DC [TR] in next six stitches, *in corner space crochet 2 DC [TR] + 2 ch + 2 DC [TR], then crochet 1 DC [TR] in the next eleven stitches.**
Repeat from * to ** twice more. Join with slip stitch to the top of the first DC [TR].
Colour C
Round 5:
Chain 1, do 1 DC [TR] in the same stitch below. Crochet 1 DC [TR] in next eight stitches, *in corner space crochet 2 DC [TR] + 2 ch + 2 DC [TR], then crochet 1 DC [TR] in the next fifteen stitches.**
Repeat from * to ** twice more. Join with slip stitch to the top of the first DC [TR].
Round 6:
Chain 1, do 1 DC [TR] in the same stitch below. Crochet 1 DC [TR] in next ten stitches, *in corner space crochet 2 DC [TR] + 2 ch + 2 DC [TR], then crochet 1 DC [TR] in the next nineteen stitches.** Repeat from * to ** twice more. Join with slip stitch to the top of the first DC [TR].
An 8, 10, or 12-round square can be made by following the instructions as per rounds 5 and 6, except that the number of stitches between each corner increases with every round. Essentially, you must do one DC [TR] in each stitch in the previous round, and 2 DC [TR] + 2 chain + 2 DC [TR] into each corner space.
To finish: chain two, yank tightly. Leave a long tail for joining, and cut yarn.
__________________________________________________________________
PLANNING
 Now, assemble your colours. Before I even start thinking about making a blanket, I look at my collection of little squares. Whenever I reach the end of a skein, I use the last smidgen of yarn to make a 1-round or 2-round square and string it on a piece of ribbon. This not only helps me to use up all the little tiny balls of yarn that manage to snarl themselves into a big, tangled mess as soon as I turn my back on them, but it also helps me visually plan my next project.
 At first I used to put them all on the same ribbon, but found it more interesting to sort them by colour – I simply put all the colours I think are nice together on one string (and sometimes re-arrange them according to whim). This helps me visualise the kind of blanket I want to make. For example, here I’ve got a string of autumnal colours (cream, brown, green), brights (red, orange, yellow, cerise pink) and a string of candy colours (pink, yellow, blue, peach, lilac), and a string of all the colours that haven’t found a family yet. Because we’re heading into autumn over here, I decided that I’d have enough browns and greens and assembled the yarn to make a candy-bright blanket instead.
  I find that twelve or thirteen colours are more than enough – I don’t like the blanket to look too “busy” and find that more than twelve or thirteen colours can make a less harmonious whole. One thing that has proved to be invaluable is a project sheet for the blanket. This sheet (check the link in the Free Stuff here) simply helps you keep a record of all the yarn you’ve used – you will never recreate the same blanket twice, but you might want to make another using the same colour scheme.
__________________________________________________________________
ENOUGH PROCRASTINATING: GET DOWN TO WORK, MISSY!
 Then you start crocheting. Sit down with a mug of tea and a good film and toss out squares of varying sizes. Four things to remember:
1) The 2-round squares should have only one round of each colour.
2) The 4/6/8/10-round squares should have two rounds of every colour and you should only use each colour once per square.
 3) The exception to 2) is the occasional square that follows the pattern of the blue square on the left: A-A-B-C-C-B. I don’t do many of these because the bigger bands made by the double rounds of one colour look less ‘busy’ and ‘bitty’, but the odd square in this pattern breaks up the monotony!
4) I do a maximum of three or four 10-round squares per blanket.
__________________________________________________________________
ASSEMBLY
When you’ve crocheted a little stack of squares, you can start putting them together. From this point on, I use an odd form of maths to calculate the width and depth. Each square is measured by its number of rounds – a 4-round square is 4, a 6-round square is 6. (Genius, eh? With these encryption skills, I ought to work for the CIA.)
In order to make a blanket that roughly fits a standard double bed (140cm/55 inches in width), I find that my blanket should be 54 rounds across. What do I mean? Look at the illustration below. Each box represents a square (the number stands for the number of rounds) and the sum of the numbers in each of the blue boxes is 54.

I crochet the blanket in strips – here you can see my first completed strip. It’s 54 rounds across and 12 rounds in length. No, I didn't use the plan above. I just put it together, willy-nilly, 'cause that's the way I roll, hookers.

My blankets are usually made up of five strips -
Strip 1 – 54 rounds across, 12 rounds long
Strip 2 – 54 rounds across, 16 rounds long
Strip 3 – 54 rounds across, 12 rounds long
Strip 4 – 54 rounds across, 16 rounds long
Strip 5 – 54 rounds across, 12 rounds long
The finished blanket’s length (before the border) is 68 rounds, which is approximately 180 cm/72 inches.
So get started! Lay the squares on a flat surface and, like a giant crochet jigsaw puzzle, put them together in a pleasing fashion :-) Once you have created your own layout, you have to sew it together. You can simply continue in this manner, just arranging and attaching the squares in a random way, or you can create your own pattern.
__________________________________________________________________
CREATING A SIMPLE PATTERN
The good news is that once you have worked out a nice 12-round and 16-round strip, you need to do very little to change it. Here is a 12-round strip (in blue) attached to a 16-round strip (in pink) - please note, not much care was taken to create this example, I just flung squares next to one another. (Obviously you will do this part with all due care and attention to create a more harmonious and balanced aesthetic.) The next time you start a 12-round strip, just leave off the first block of squares – below, I just moved the first three 4-round squares (in darker blue) to the end of the strip. When it came to the second 16-round strip, I just moved the first block of squares (in darker pink) to the end of the strip. In the last 12-round strip, the first 6-round squares have also just been moved across to the end. The overall effect is random to the untrained eye because you’ve used different colours in each strip – but there’s method in your madness!

__________________________________________________________________
 I simply edge the blanket with a row of DC [TR] followed by a row of SC [DC] in a contrasting colour.
__________________________________________________________________
EDGING
 I simply edge the blanket with a row of DC [TR] followed by a row of SC [DC] in a contrasting colour.
 __________________________________________________________________
ODDS AND ENDS
A note about assembly...
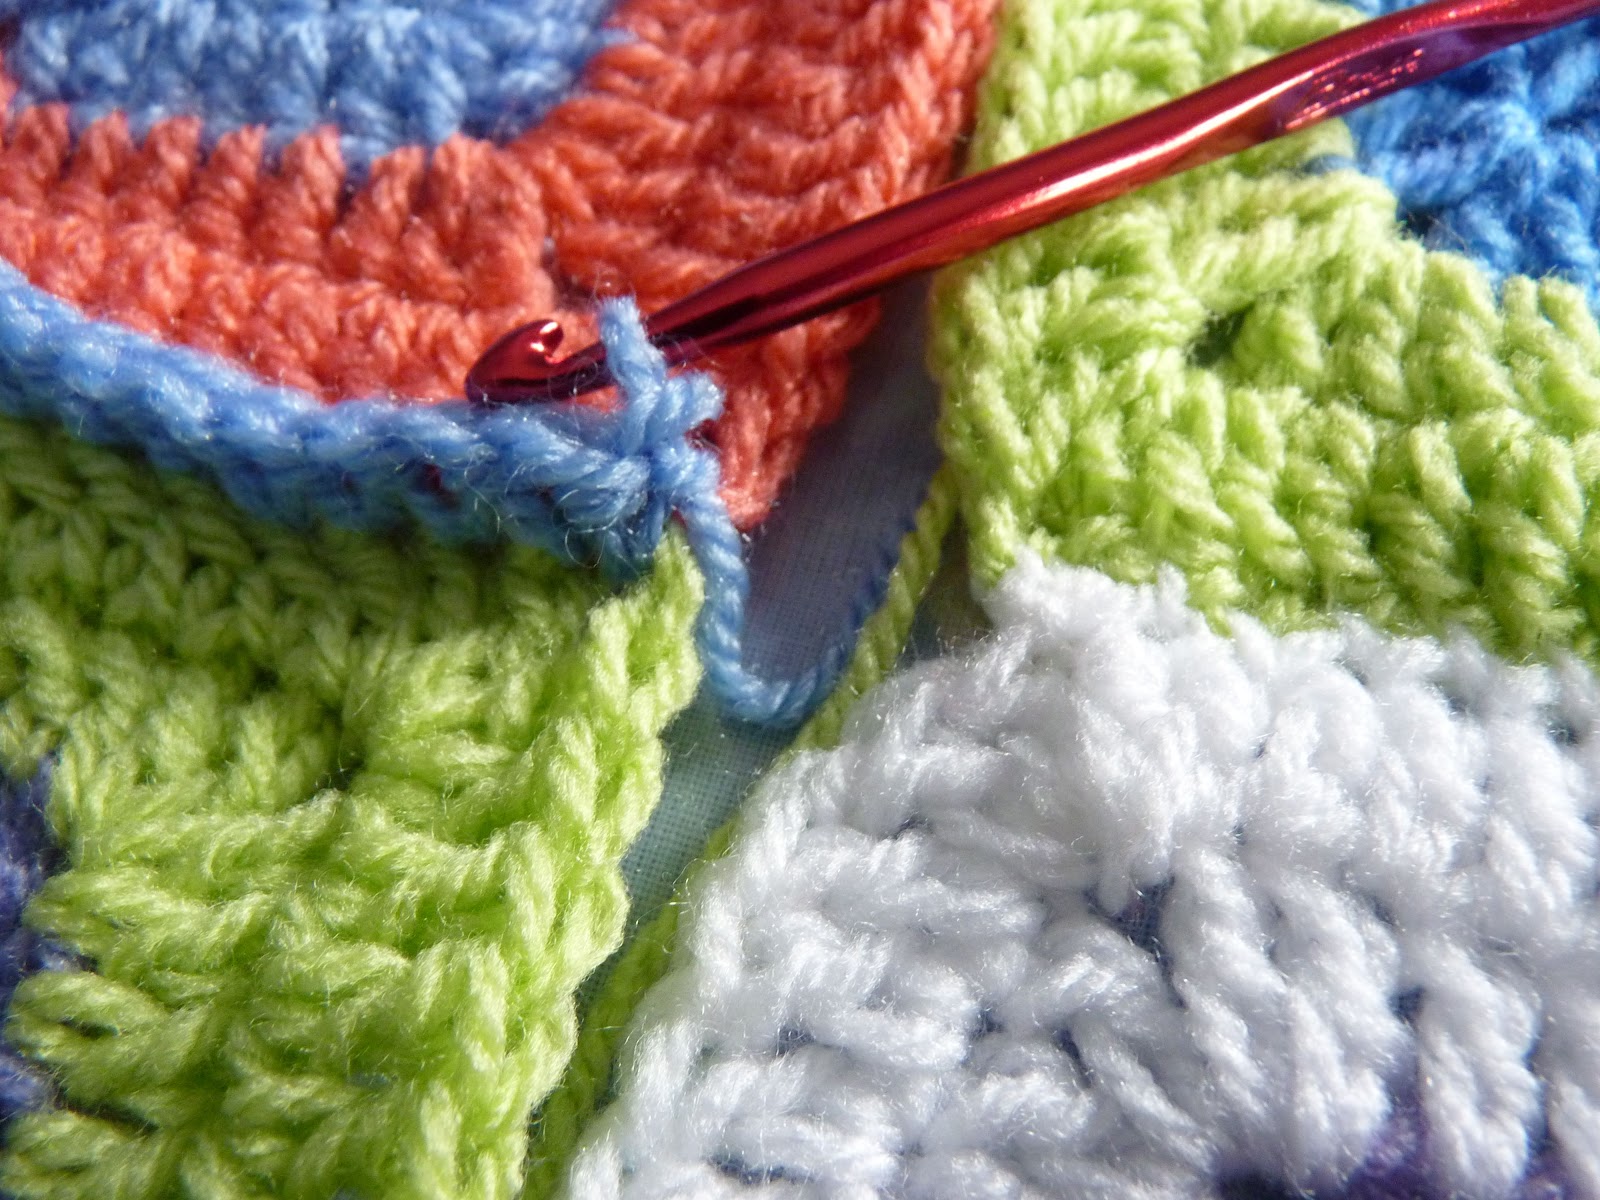
Eibhlin asked if you could crochet the squares together. Theoretically, you certainly could. I personally think this method looks nicer when the squares are of uniform size, because the crochet seam forms a kind of ridge or frame around the squares. When the squares are of different sizes - especially with so many little ones, - I find that this method tugs the fabric a little bit, so I prefer to whipstitch them together. Below is a photo of two squares crocheted together (on the left) and sewn together (on the right.) I've used a different colour yarn to show you the 'ridge' effect.

Ends and weaving:
A few of you had questions about ends and weaving (hello, CJ and Fairyhedgehog!). Normally when I finish a square, I leave a tail that's three times the length of one side. I use this tail to sew the square to its neighbour(s). I then make - yes, eek, prepare to throw your hooks now - a small knot and yank the yarn tight. The knot is generally not visible and can only be found by squishing the squares to find it with your fingers. I weave the leftover yarn in and out and up and down, and leave a little tail to crochet or weave over. I wash the blanket once before I wrap it up in cellophane for its next owner, and I have yet to see any undone ends. Maybe they're too afraid of me to unravel.
Can you join as you go?
This method seems to work best with traditional granny squares or squares with a lacier texture where the point of joining is between a 3 DC[TR] cluster (see an example on this video here). Of course, here's nothing stopping you from making this blanket with traditional grannies - I just like the solid squares myself, but you can use any granny square pattern that can be completed in a variety of rounds.
Curious to see the finished blanket? Click HERE!
Curious to see the finished blanket? Click HERE!
46 comments:
The Babette blanket is what got me started on crochet. The desire to make one. Funny though, now that I can crochet, it is not all that high on the list. But, what I do like is yout tutorial. Fab, logical and full of potential. It seems more free than the Babette pattern. Open to interpretation.
Thank you.
Brilliant as usual :-) Thanks a lot!
(By the way - Realta pattern was great, I made a very nice blanket! Now I'm in Japan, so I need to stop crocheting a bit, but when I'm back in London - I will certainly make this 'Klimt without the nudes' too :-) )
I love your blog. It always makes me laugh. Thank you for the tut! It's a beautiful afghan. I can't decide which color I liked better.
Wow, that looks amazing, and it such a help since i am rubbish at designing. I will definitely be making one!
Love your blanket ... and the tutorial.
Firstly, thank you. I can imagine how long this took you to construct, and the fact that you are doing it out of the kindness of your heart for other crocheters is beyond admirable.
Secondly, curses! Although I am grateful for your explanation of how you deal with ends (spit!), I confess that I was hoping, nay expecting, you to have some magical secret way of sealing the conclusion of a yarn run so perfectly that ends would simply cease to exist. BTW I have no problem at all with knots, can't understand those who do. A knot is nature's way of staying "and STAY there you little stinker". I like knots.
Thank you again.
cj
Thank you for the tutorial - can't wait to start one - as soon as I finish all the other projects I have laying around!
I had tried to order the pattern for the Realta - will try again as some point - it is high on my 'must-do' list.
Karen
Thank you all for your comments! The only thing I can say is "try it"... Add bits to it as you go along. Sadly, its very nature lends itself to being a perfect 'Eternal WIP', but you might surprise yourself and finish it off!
CJ, I am so sorry not to be able to share the Holy Grail of Tale Weaving - sadly, it eludes me, too. It's kind of a necessary evil, like flossing and other thread-based tortures. But the end result is worth it (which is what I have to keep saying: there are 22 squares in front of me, ready to be sewn together for the last panel)
Hanna - is that you in Kyoto? SO nice to hear from you! Will leave a comment on your new blog, just in case ...
I wanted to use worsted weight yarn to crochet my "Babette", so I went my own way without the pattern. Oh my, the hours your tutorial would have saved me! LOL!
Thank you for sharing it with us.
Linda
I have a technique question for you.
When I do a normal granny square, my corners are ch3 (if I ch2, it curls. I find the addition of the extra stitch makes it stay flat).
That being the case, should I add an extra TR into the corner for the solid square?
Hello InfoxicatingLady
I wouldn't add an extra TR into the corners, because I find that too many stitches in the corners tend to make my squares bunch or curl. Going with an extra chain is a good idea, though, because it'll 'square up' the motifs if you find that your corners are too tight. I hope your blanket is going well - I just logged on to update with a picture of mine :-)
And thank you Alottastitches! I just had a look at your blog and I bet you'd have loads and loads of leftovers that might be perfect for a stack of crazy squares ;-) Lovely work!
Thank you so much for this pattern! I've been looking at it for a while and yesterday I went out and bought some yarn to start- I was wondering- what size hook did you use?
I love this, thank you!
Just have to say thank you for going to the trouble of sharing all this on your blog. What an inspiration!!
I have so many WIP, I am sure this one will join the pile many times over.
I have been looking for this pattern FOREVER !! THANK YOU THANK YOU for sharing it and making it a PDF download !! I still concidered myself new to crocheting. I had to take some time off since I am now raising my nieces youngest child he just turned 1 on Christmas Day and he has lived with us since he was 3 days old! He was a premie perfectly healthy ! It's been 23 years since I have had a little little one to take care of and I had forgotten how they demand every second of your waken hours so that don't leave much time for crocheting or much any thing else. This is the PERFECT project I could do!! Thank you so much !! Love all of your beautiful creations !! XOXO
cmm and Lynn - so glad you like it! The pattern is so easy and allows you to be endlessly creaive, it's definitely one of my favourites :-)
Thank you so much for this tutorial, it looks amazing! Ive just learned crocheting two days ago and this definately got me enthusiastic! So, here's a beginner's question. My squares are getting better every time, but I can't figure out how to join two colors together and create a perfect transition between two rings. Where, and how do you join in the other yarn?
Hello Susanne,
I'm glad you like the tutorial and it is a good one to learn new skills with!
In answer to your question, where you join the new yarn, this is the instruction at the beginning of round 3:
Chain 1, do 1 DC [TR] in the same stitch below.
You put your hook through any stitch, pull the yarn through, make a chain and do a DC/TR in the same stitch. For a beginner, though, it's sometimes easier to see it being done, as opposed to reading an instruction so ... YouTube is your friend! There are lots of tutorials about crochet basics, just to give you an idea about how these things work in practice, and suddenly these weird-sounding instructions make much more sense :-)
Susanne:
Just an afterthought, here's the pattern for the same square, just written out a bit more fully. Perhaps this might help you more?
http://gingerschatz.blogspot.de/2010/03/solid-crochet-square.html
Thank you very much! It seems there is more than one way to do the square. I have heaps of little squares now and I've also figured out how to join two different colors from youtube. One day they might even become a blanket, lol!
Just curious; do you have any idea how many yarns you used in total to do this blanket?
Suzanne - normally about 12 colours, give or take. Actually, if you look back at the post, you'll see a picture of the basket with all of the colours I used inthe candy- coloured blanket!
Hiya, I clicked the link but couldnt see the PDF. Im asked to sign in?
Please help, Im a bear of little brain at the moment. How do I get the PDF please?
thank you for this awesome infomation. xxxx
Amazing tutorial! I'm really impressed, and inspired, thank you!
Hola The Gingerbread Lady,me apasione por tu diseño manta,hace un tiempo pedí autorización para tejerla y postearla en mi blog,dándote los créditos como diseñadora, y así lo hice,te cuento que ya tejí 3 y voy por la cuarta,respetando lo que tu pides ,no es para la venta,mi hija tiene una amiga que nació su segundo hijo,y se la pienso regalar en tomos blancos celestes y azules,mi facebook es judith pedetti ,pienso publicarlo ,aun no la termine,y mi blog es http://texturasytejidos.blogspot.com,mi correo es judith.pedetti"gmail.com,
desde ya te lo agradezco.
saludos desde Montevideo,Uruguay
judith
Thank you, your post was very useful
to make my babette !
Licia
Thanks for sharing your pattern. I made a small one for my friend.
I'd like to show you a pjotp buy don't know how?
'photo' :)
Hello Deanna,
I'd *love* to see a photo! If you send me your email address in a comment (which I won't publish, of course) I'll send you a quick email and you could send me a photo that way.
I love this blog!!!!!!!!!!!!!
THANK YOU so much for your tutorial - read over a year ago and finally my own blanket is finished today! It only took a month once I got going on it. If you would like to take a look, go to my blog about it here
http://hyotenka.blogspot.jp/2014/02/crazy-patchwork-afghan-done-february.html
The colours were chosen by my niece but she doesn't know what sort of pattern they were going to turn into. I hope she likes it....
Wow! I'd already seen the picture and thought it was marvelous, a fantastic idea to make a wall hanging, and going around your awesome place i find the pattern!!! I felt too lazy to work it out myself, it's too hot for thinking here ;) So, thank you very-very much for sharing. Hug and kisses from Spain
I am very new to crocheting - this blanket for my grandson will be my first project - and I've had to try and teach myself from the internet. Your blog has been invaluable and I'm using your layout guide. Could you tell me if you fasten off and rejoin after each round or do you just carry on up to the next round? And do you do this whether the following round is the same or a different colour? I looked at the link you have giving a more simple version of the pattern with some photos and it looked as if you did fasten off and re-start.
Hello Kitchen Momma,
You only fasten off when you join a NEW colour. When you're doing the next round in the same colour, you just begin the next round either with 3 chain (which creates a first 'fake' DC) or you do 1 chain and then do a DC into the same stitch you did the chain from. (this creates a fatter first stitch in the round and makes the beginning of the round less visible. Either method is a perfectly good way to begin the round.)
When I have finished with one colour, I do two chains, then cut the yarn, yank it tight (so the chains won't unravel) and either sew in this end (if I'm going to join a new colour) or leave a long yarn tail (approx 3 times the length of one side of the square) so I can use this yarn to sew the square to another one.
What I normally do is a bit like "conveyor belt crochet": in other words, I start by doing a lot of two-round squares in various colours, then I add round 3 & 4 to them in another colour, then I do 5 & 6. Which means that I do a lot of crocheting, then stack my squares and quickly weave in the ends, then join the next colour and, when I have a small heap of squares with a new colour added, a do another end-weaving session.
I hope this has been useful - please feel free to ask again if you have any more questions or if I haven't explained something clearly :-D
Thank you for the wonderful post and tutorial. So very well done. Color planning seems to be a challenge for me! I know what I like when I see it completed in other's work, but I have difficulty putting my own together. Love your suggestions on organizing and logging yarn/colors, etc. Thank you again. Incredibly helpful!
Hi, thanks so much for the pattern and the tips above which have been very helpful.
I wonder if you could help me with an issue I'm having. I seem to be managing rounds 1 and 2 okay using the fake chain 1, treble in the same stitch method. I say I seem to be managing in the sense that I end up with the right number of stitches. But when I come to do round 3 I'm struggling to know where to put the stitches in around the fake stitch and sometimes end up with an extra stitch and I can't work out what I'm doing wrong. I tried chaining 3 to start the round but it looks too gappy so I want to stick to your method. Hope this makes sense and you're able to help in some way, many thanks!
Randomhiccup, I tried to send you a message via your blog but I failed. I'm sorry I've taken such a long time to reply. Has teh problem been resolved or do you still need help?
Hi Olivia!
I started making this blanket and have one question. You don't mention where we should join the new color, but I assume by the number of DCs following that we should join the new color where we finished the previous color. Anyway, when I follow the instructions and leave a big tail in the end to join the squares, the tail starts in the middle of the square side and not the end. Does it make sense?
I haven't started joining the squares yet, but I imagine this will be a problem when I do. Hope you can shed some light here! :)
LOVE your work!
Big hugs,
Meire
Hello Meire,
It doesn't matter very much where you join the new colour, but I like to join it in the corner space, because I think it looks less obvious. This means that, two rounds later, your last stitch should be about two stitches from the corner. In answer to your question, though, I normally thread the tail through the tops of the stitches until it reaches the corner and then sew it to its neighbour. If your tail starts in the middle of the square, it just means you have to thread it through the stitches to bring it to the corner. You have to do this regardless of where you join the colour, but if you join your colour in the corner, there's not as far to go :-D
I hope this helps and I'm really looking forward to seeing a photo!
Olivia
sorry, I'm not sure if my comment went through. Love this blanket! About how much yarn would it take to make?
Thank you for sharing the tutorial for Klimt Blanket. It is so wonderful
Hi,
This tutorial is amazing! I really love it, I am having a problem with the squares not lying flat, they tend to bunch in between the holes (where I've chained two). Do you have any idea what might be causing this? or what I could do to stop this?
Love your work,
Thanks,
Elizabeth
Hello Elizabeth, without seeing a picture it's hard to be sure what the problem is - if you want to send me a picture, post a comment with your email address (it won't be published) and I'll see if I can figure it out.
Often, though, if stuff is bunch up, it's because your tension is too tight... you might be a tight crocheter and may need to go up a hook size. Some problems with wavy squares can be solved by blocking them afterwards, this makes the wool stretch into shape that bit better and makes them lie flat.
I LOVE this pattern! May I ask what size hook you used? ☺ Becky
love, love , love this!!!! but i am trying to download the pattern of the Klimt blanquet and it seems not to be available any more.. is there a way I could get it?
Post a Comment